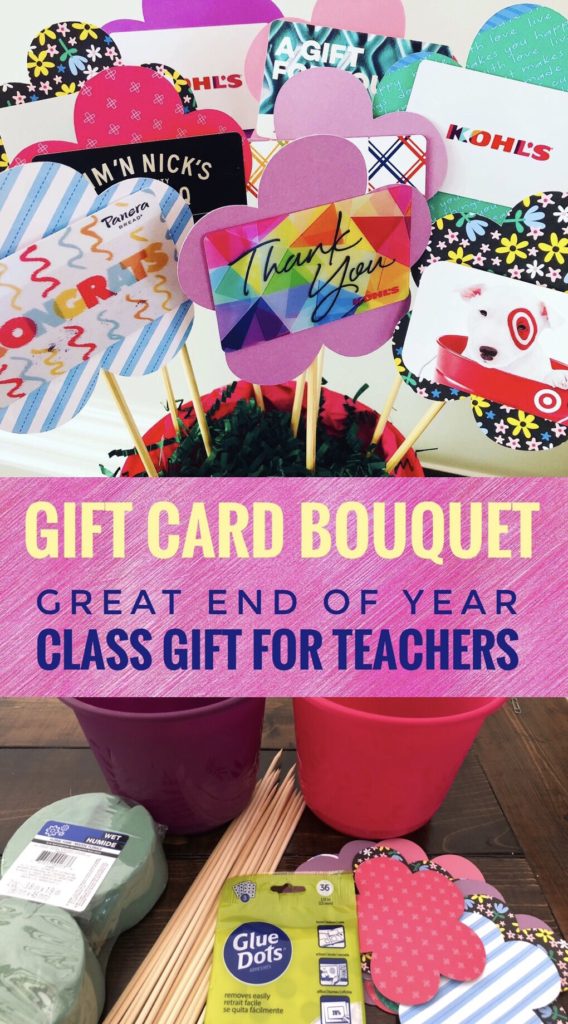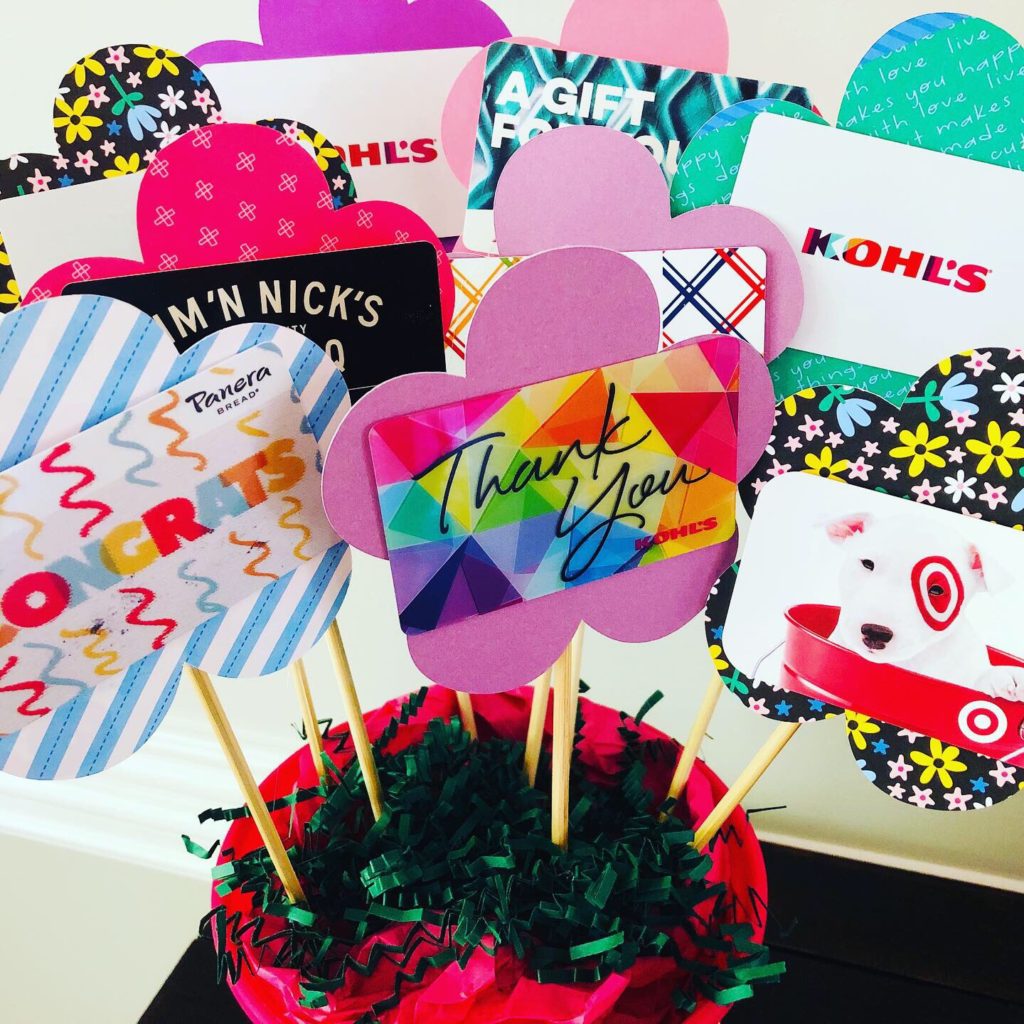
We celebrated our last days of preschool this week! It is such a bittersweet feeling. There is so much excitement for summer and starting kindergarten. I also know we’re going to miss this sweet school and all the wonderful teachers so much. It has been such a blessing to get to know all the kids, parents, and teachers this year. When it came time to talk about doing an end of year gift, I was definitely on board to put together this Gift Card Bouquet for our teachers.
This post does include affiliate links. That means I could earn a tiny portion of any sale that is made through clicking on any of these products with no additional cost to you. All support is greatly appreciated!
What is a Gift Card Bouquet?
A gift card bouquet is really a great gift for any occasion. Everyone loves to receive gift cards to their favorite stores. I can see this being a fun idea for birthday, graduation, and holiday gift giving.
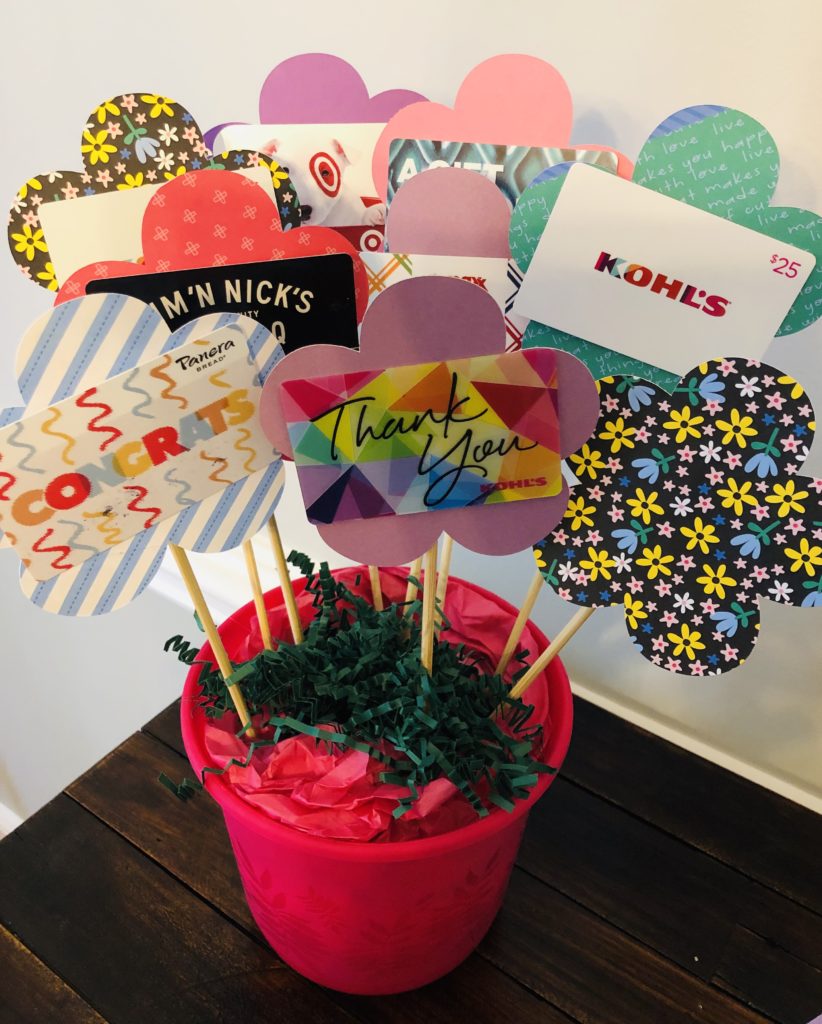
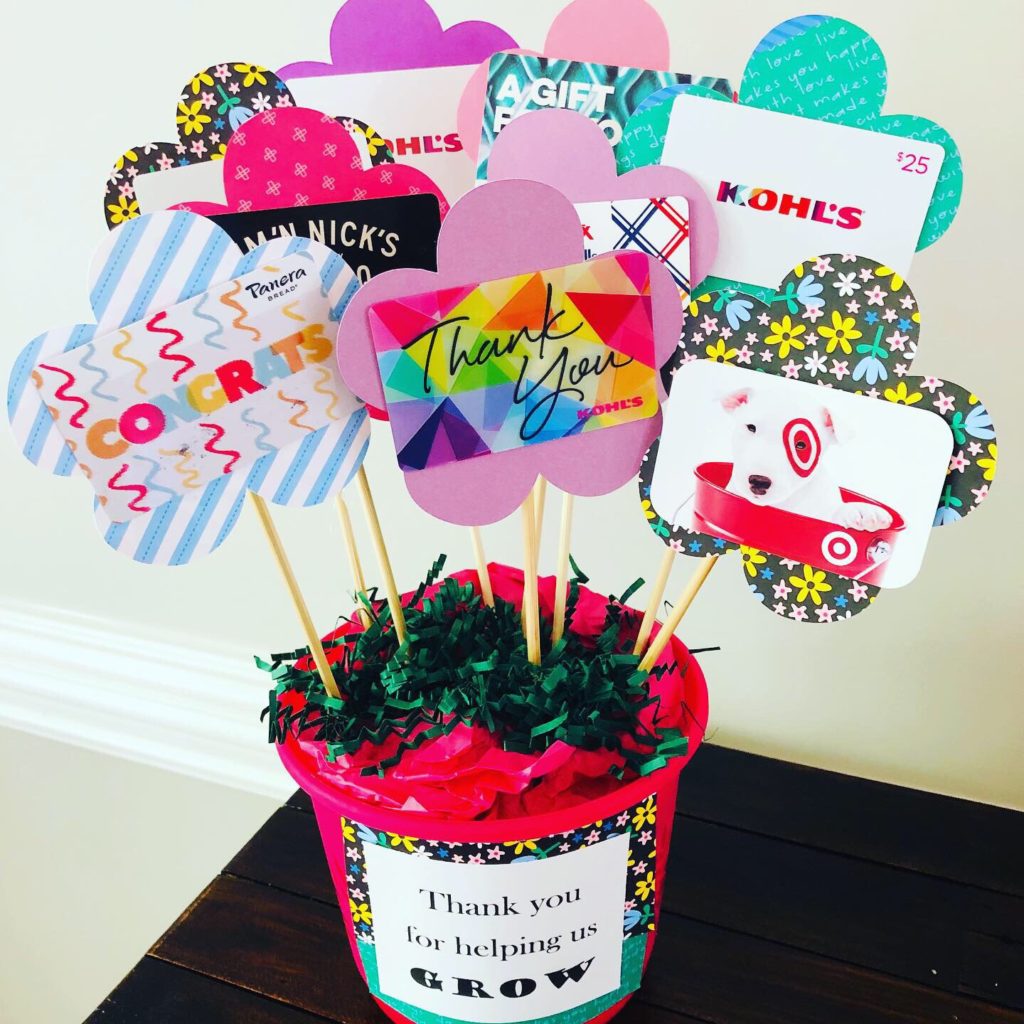
The gift card bouquet is just a creative way to display the gift cards. This makes it a more thoughtful gift. Our class collected nine gift cards for each teacher but I’ve seen really cute ones using only five gift cards.
Supplies Needed for a Gift Card Bouquet
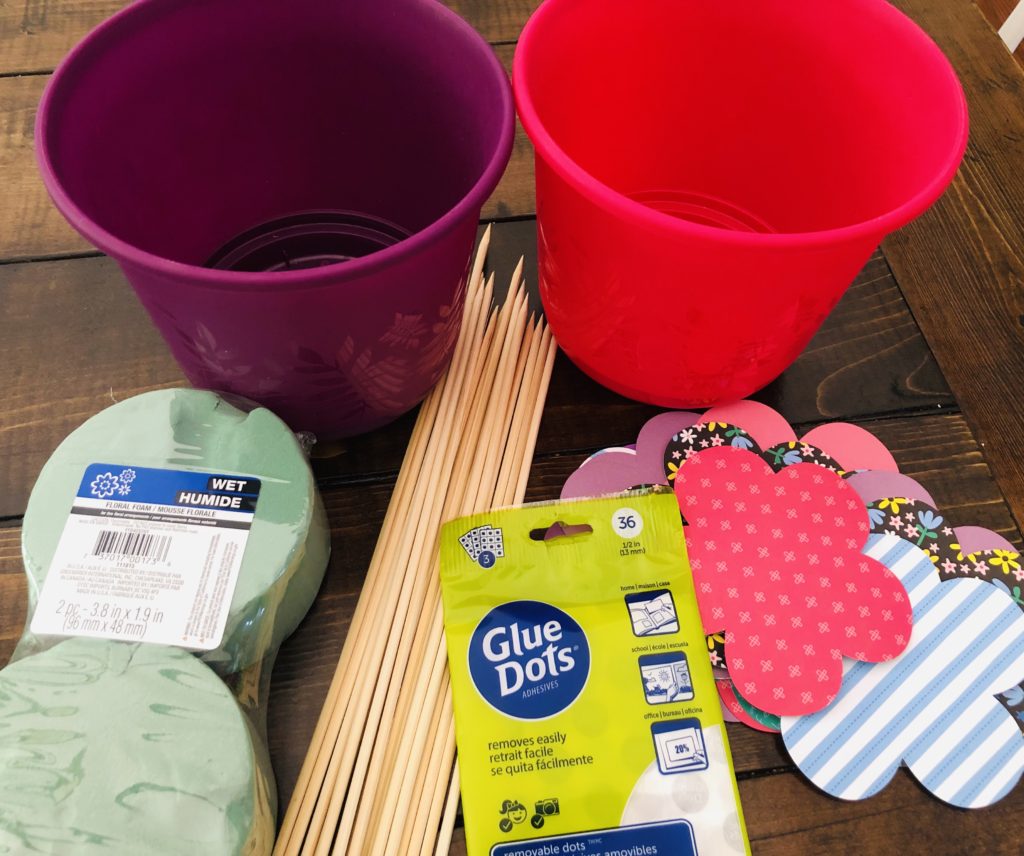
I was able to find a lot of the supplies I needed for our gift card bouquet at Dollar Tree. I always check there first when I get ready to start a new project. See below for a list of supplies I used.
- Flower Pot or container
- Bamboo Sticks
- Floral Foam
- Patterned Paper or Flower Cutouts
- Glue Dots
- Glue Gun
- Gift Tissue Paper
Creating the Flowers for a Gift Card Bouquet
I actually looked around quite a bit for foam flower shapes. I even considered purchasing wooden flowers and painting them. When I couldn’t find anything that I really wanted to use, I decided to actually use my Cricut Machine to cut them out. You can also purchase a package of Flower Cutouts that would probably work great for this too.
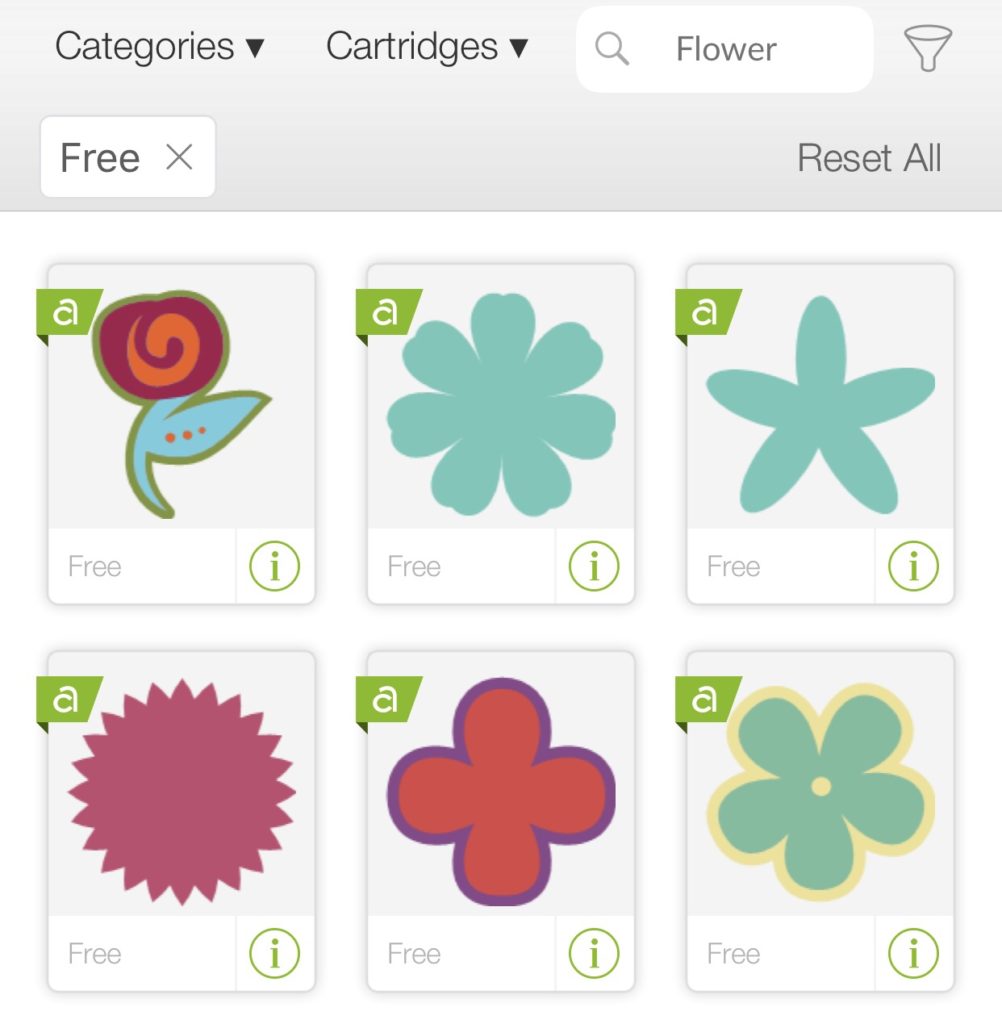
I just did a search in the Design Space App for flowers. There were a lot of options. I chose to do a filter for all of the free options since this project only needed a basic flower shape. I decided on the flower in the bottom right corner pictured above.
I used patterned paper and a mix of solid color cardstock for the flowers to give it some variety. I love the pretty colors of purples, greens, and blues.
How to Assemble the Gift Card Bouquet
Once I had the flowers cut, I was able to attach the gift cards using glue dots. If they aren’t staying on, you could also add a little masking tape. I ended up adding tape since I was worried about transporting them to the school.
Then I used a hot glue gun to secure the floral foam to the bottom of the pot. The floral foam I used was from Dollar Tree. You could also use this floral foam from Amazon depending on the size of your pot.
I also tucked in a sheet of gift wrap tissue all around it for extra support. The next step is to insert the bamboo sticks into the foam. Once I was happy with the placement of the sticks, I used a glue gun to adhere the flowers onto them.
To finish off the project I also added another sheet of gift wrap tissue and some green paper shreds. Then I printed a little note on cardstock that said, “thank you for helping us grow.” This was such a fitting note since these kids had made such progress this year.

I also used a bit more of the patterned paper to accent the note and decorate the little pot. We were all so happy with how it turned out. The teachers were also very appreciative of this gift.
I love giving gift cards for all occasions! Sometimes I’ll just send it inside a card but it can be fun to think of other ways to gift them. If you are looking for something a little more simple, check out my DIY Gift Card Holder. It only requires one sheet of paper and no additional tools at all!