 If the idea of glitter makes you twitchy, this may not be the project for you. We love all things glittery and sparkly though. DIY Plastic Glitter Eggs are super easy and fun to make. It may get a little messy but it is totally worth it!
**I was compensated for this post. This post also contains affiliate links and I will be compensated if you make a purchase after clicking on my links.

Have you been in Dollar Tree recently? They are the place to go when it comes to all things Easter! If you need Easter basket supplies, you definitely need to check there first. I made two baskets for less than $25 a couple of years ago. So when I decided to make these DIY Plastic Easter Eggs, Dollar Tree is where I headed for my supplies.
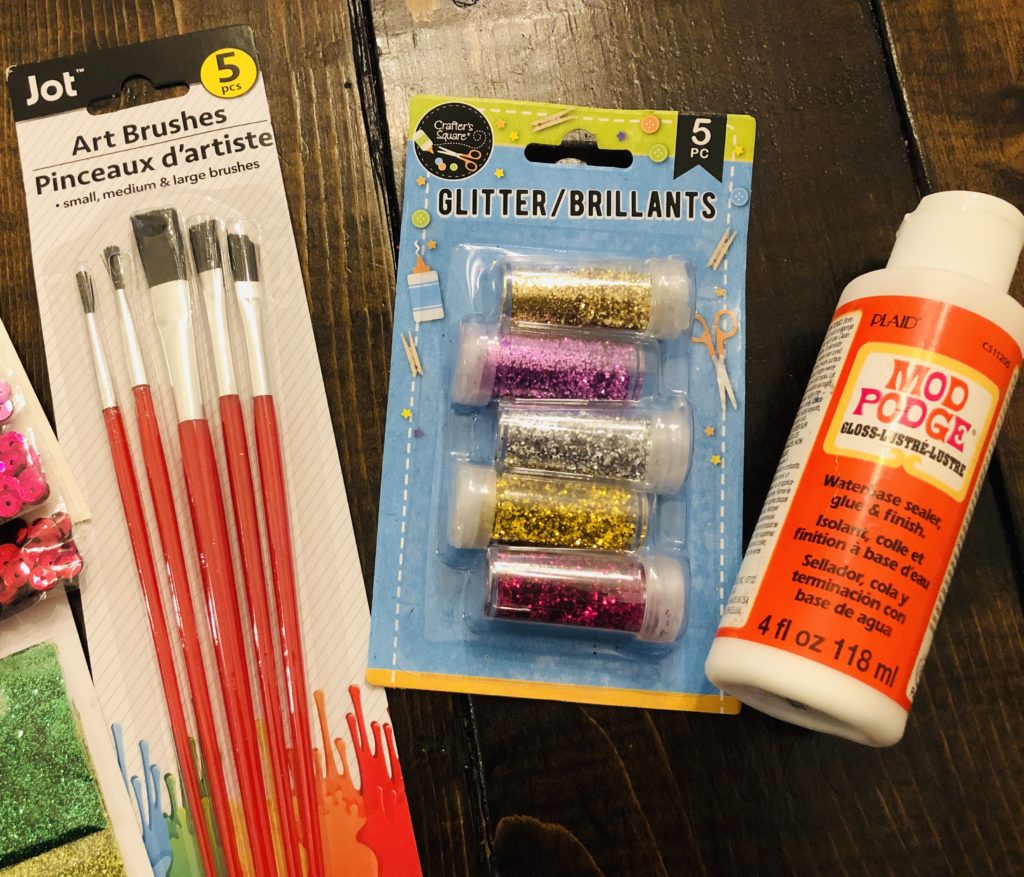
Not only did they have an amazing selection of plastic eggs, they also have a wide variety of crafting supplies. I always stock up on glitter, foam stickers, sequins, markers, craft sticks and more! I used the following supplies for this egg craft:
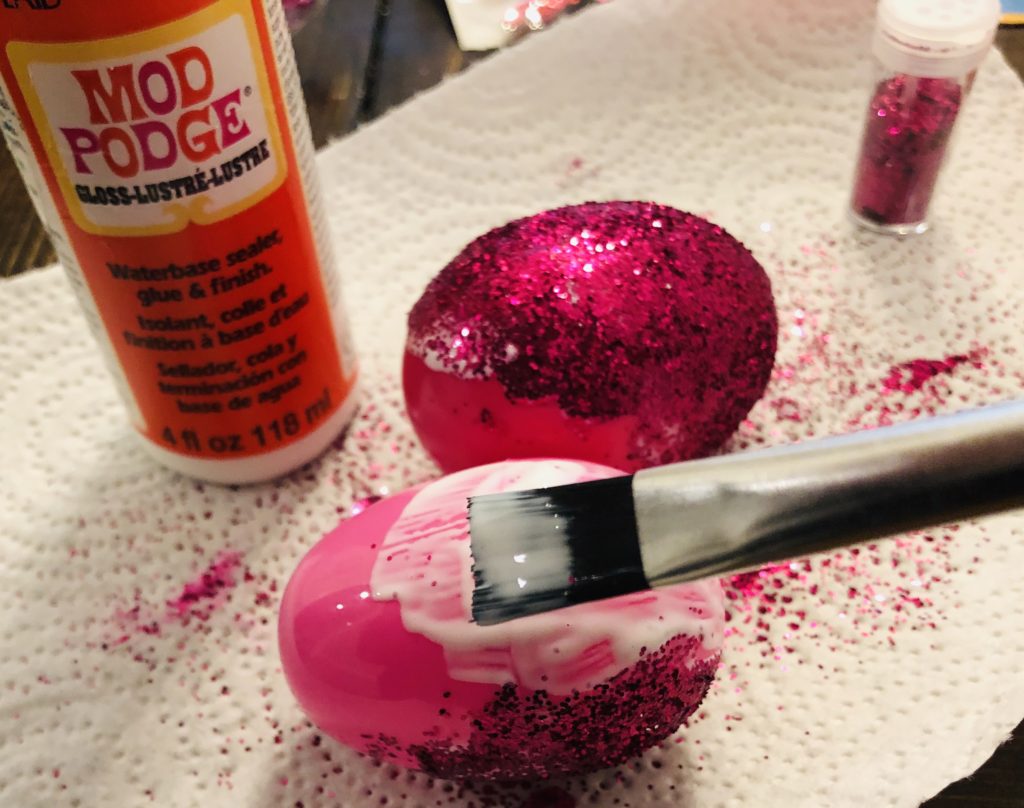
Once you have all the supplies, apply the modge podge directly onto the plastic egg using a paint brush. Then sprinkle the glitter onto the egg. I did one side of each egg at a time. I let it dry for about an hour in between so that the glitter had time to adhere.

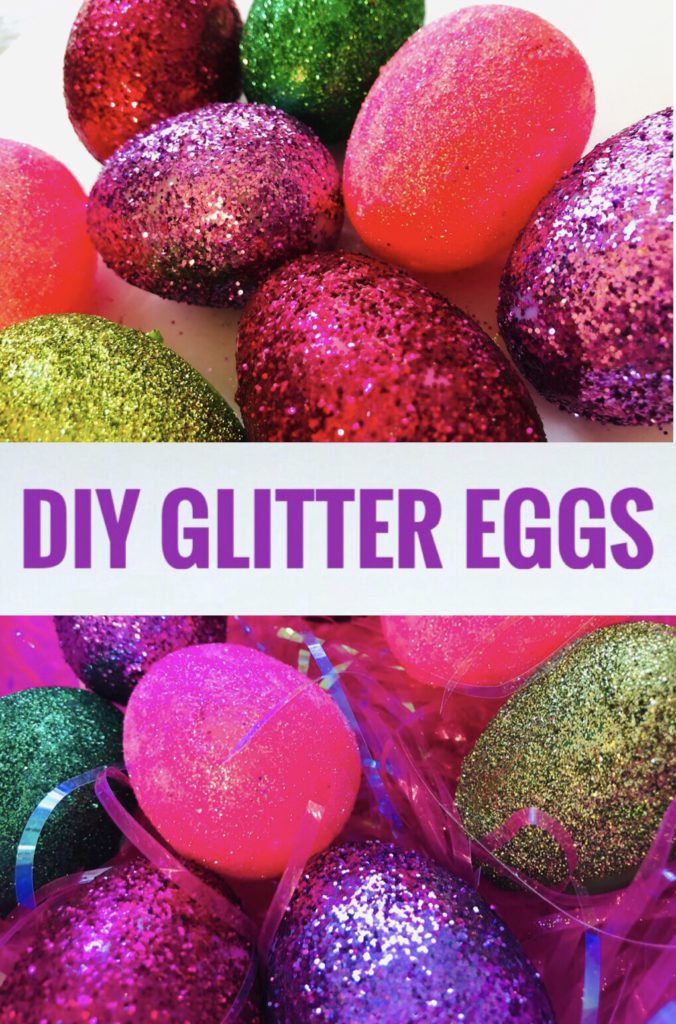
See how easy these are to make! The hardest part is having the patience to let the glue dry. This is a great project if you are looking to decorate with a certain color scheme. These eggs would look so pretty in a glass vase or in a centerpiece.

Bring on the Crafts — A Craft & DIY Blog Hop
On the first Friday of each month, a group of DIY and crafty bloggers join forces. Together with hosts Marie from The Inspiration Vault and Habiba from Craftify My Love, they bring you the #BringontheCrafts blog hop. Each blogger creates a fun craft or DIY project to share that follows a monthly materials theme. March’s theme is Mod Podge! Each blogger chooses their own craft to make as long as they love it and it uses Mod Podge in the project.
Our March Co-hosts
Jenny at Cookies, Coffee and Crafts • Gail at Purple Hues and Me
Heather at Glitter on a Dime • Marie at DIY Adulation • Janet at Try It – Like It
Join in on the fun! If you’d like to participate next month, you can request to join our Bring on the Crafts Facebook Group. Next month’s theme is Flowers!
Not a blogger, but a creative mind none the less!? Don’t worry, Share your awesome creations in our Craft Cult Facebook Group. This is also a great place to ask craft & DIY related questions and find inspiration for your next project.
Now let’s see all of those amazing Craft and DIY Projects!
Pretty! Thanks for sharing your glittery eggs at the Merry Monday linky party! Pinning!
Thank you Lauren!