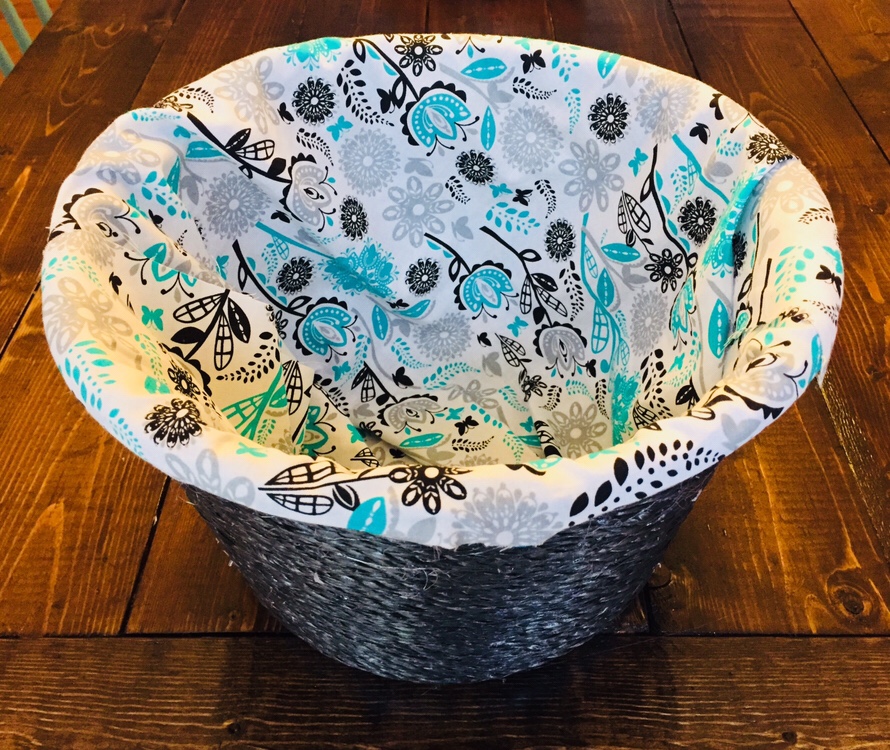
Last week was Week 7 of the 52 Weeks of Pinterest Challenge. I had really high hopes for the project I had picked out. We have a shoe organization problem at our house. I feel like there are shoes everywhere all the time. A friend of mine keeps baskets at each of her doors for shoes and I thought that was a brilliant idea. I had seen this DIY Dollar Tree Basket Pin from Amie at Busy Bliss and thought it would be perfect for my shoe basket.
This post does include affiliate links. That means I could earn a tiny portion of any sale that is made through clicking on any of these products with no additional cost to you. All support is greatly appreciated! ?
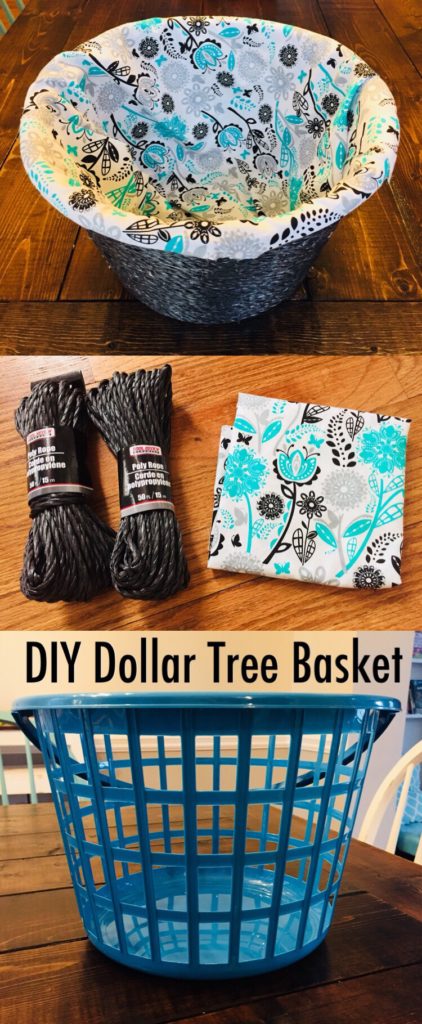
Last Sunday, Graylie and I made a trip to Joann’s Fabric Store. Since I don’t sew, I didn’t have any fabric scraps to use like Amie. It was so much fun looking at all the patterns. I had plenty of Dollar Tree baskets to use and had already picked up some gray rope from the Dollar Tree as well.


For this project you only need a few supplies:
- Plastic tote/basket
- About 1/2 yard of fabric
- Rope or Twine
- Glue Gun
 I was excited to get started. I should have known this might not be a good project for me when my 8 year old son had to show me how to get the fabric to fit inside the basket! Once I had that figured out, I cut the fabric around the top of the basket. I ended up cutting it too close to the top. You should leave extra fabric and then wrap the rope around it.
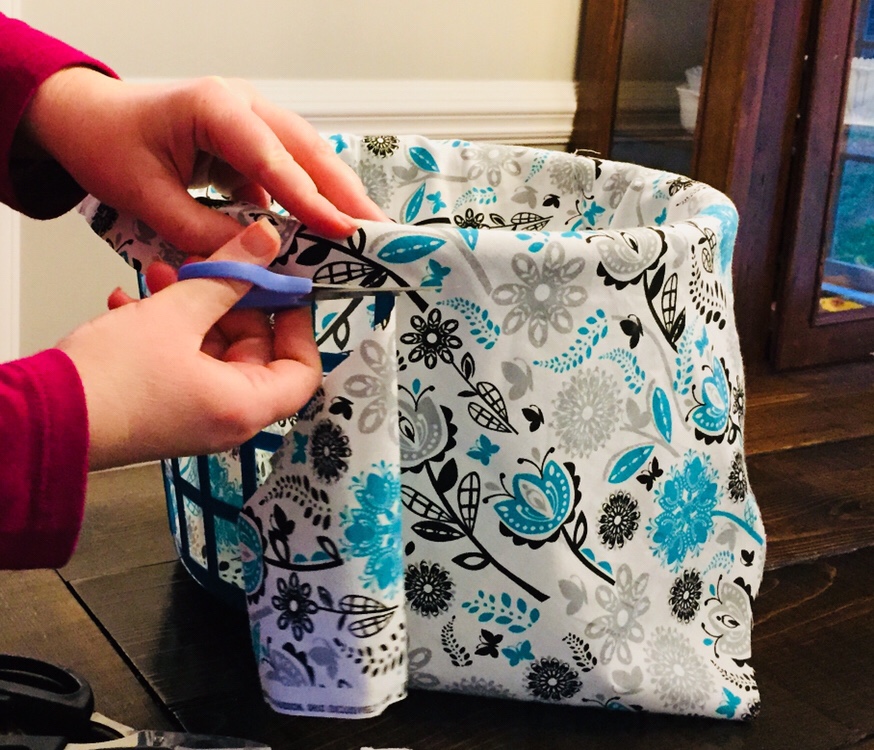
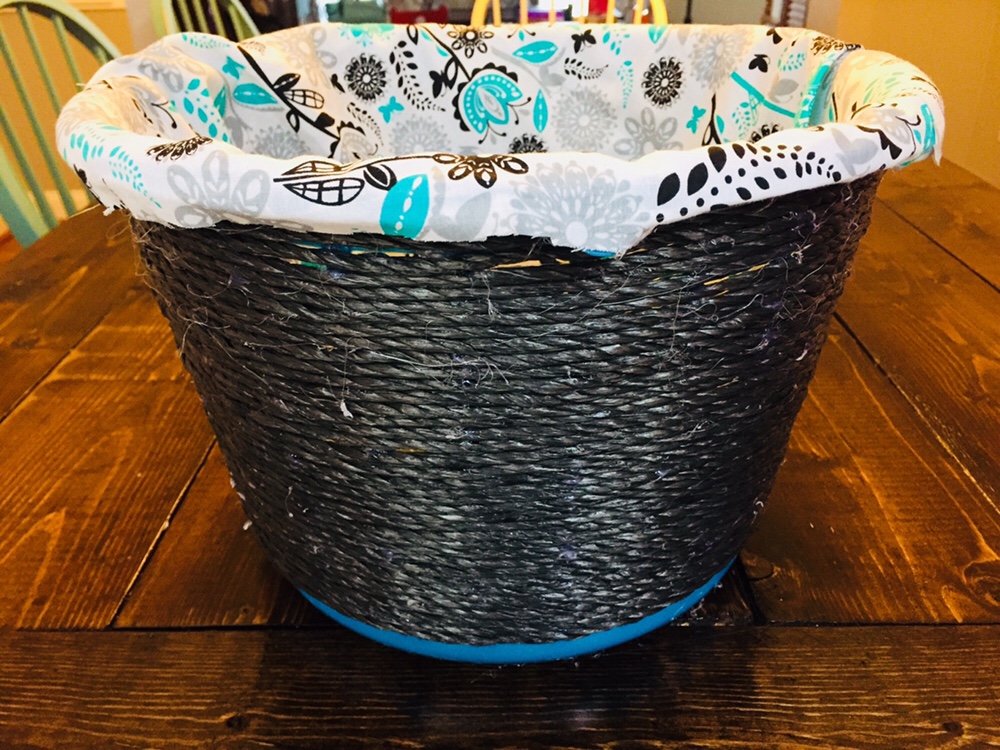
Once I had trimmed the fabric, I started wrapping the rope around the basket and securing it with the hot glue. I thought this part was a little tedious and it ended up taking me about three days to finally get it done. I ran out of rope towards the end of the basket so my basket is not completely wrapped. I honestly think it looks like a hot mess!
I think this could have turned out better with practice so I don’t want to discourage anyone from giving it a try! I just wouldn’t say it is one of my most successful Pinterest Projects! The fun part of this challenge is trying things that I wouldn’t normally do. I am most crafty with paper, scissors, and paint.
I’m already looking forward to the next challenge! I am hoping to try some of the many pins I have for Lunch Prep. Anyone here prep lunch for the entire week? It sounds like a brilliant idea to me so we’ll see how that goes.
Good job trying, I feel so motivated to try more crafts when I see your posts.
I would have no idea how to get started with that one.
Thanks Emily! It was fun!
I’m not sure I would be able to handle this basket project either. It looks tricky! But you’ve inspired me to decide on a basket project for our mountain of shoes!
It was a little tricky and more time consuming than I would have liked. It was fun though and I think it will be very useful for my kids’ shoes.
Using hot glue can definitely be tedious after awhile because it dries so quick. I think this turned okay okay; I’m sure my attempt would be just down right awful. LOL That’s great you’re trying new projects though. 🙂
-Lauren
Thanks Lauren! Yes, the glue gun got very tedious. I actually just got it a few months ago so I’m sure I’ll get better at it. I am loving trying new projects. Part of the fun is also deciding what to do next!