 Last week I was in Michaels getting the supplies for this project. We enjoyed the rock painting so much, I though it would be fun to do a painting project outside again this weekend. For the past couple of weeks we have had beautiful spring days and I was itching to get outside and enjoy it. Well, the weekend was not as warm and beautiful. I did not let it ruin our plans though. We just had to improvise and set up at the kitchen table. We laid out newspaper over the table and painted away! This project is so much fun and makes a great decoration for a playroom or child’s bedroom.
Tape Painting
Supplies Needed:
- blank canvas
- acrylic paints
- paint brushes
- painters tape
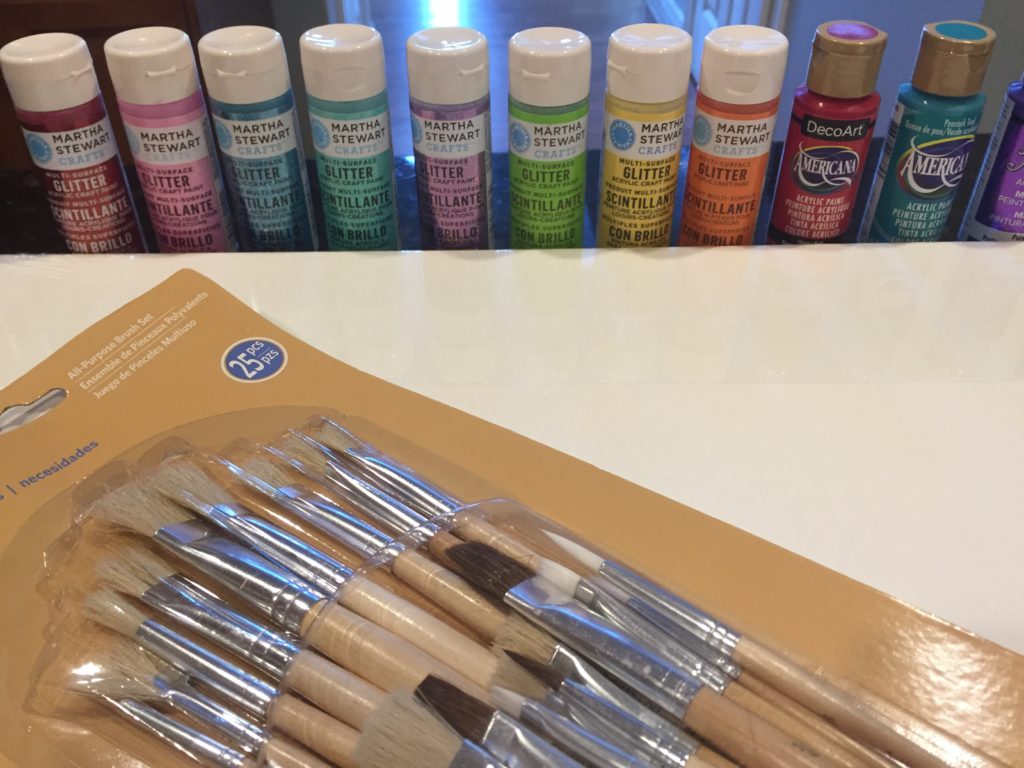
As you can see this project does not require a lot of supplies. We did try some new paint. When I was in the craft paint section, I saw the Martha Stewart Glitter Paints. Some of them were on clearance so I could not resist! These made a nice accent to some of our other paints. We really enjoy the metallic paints.
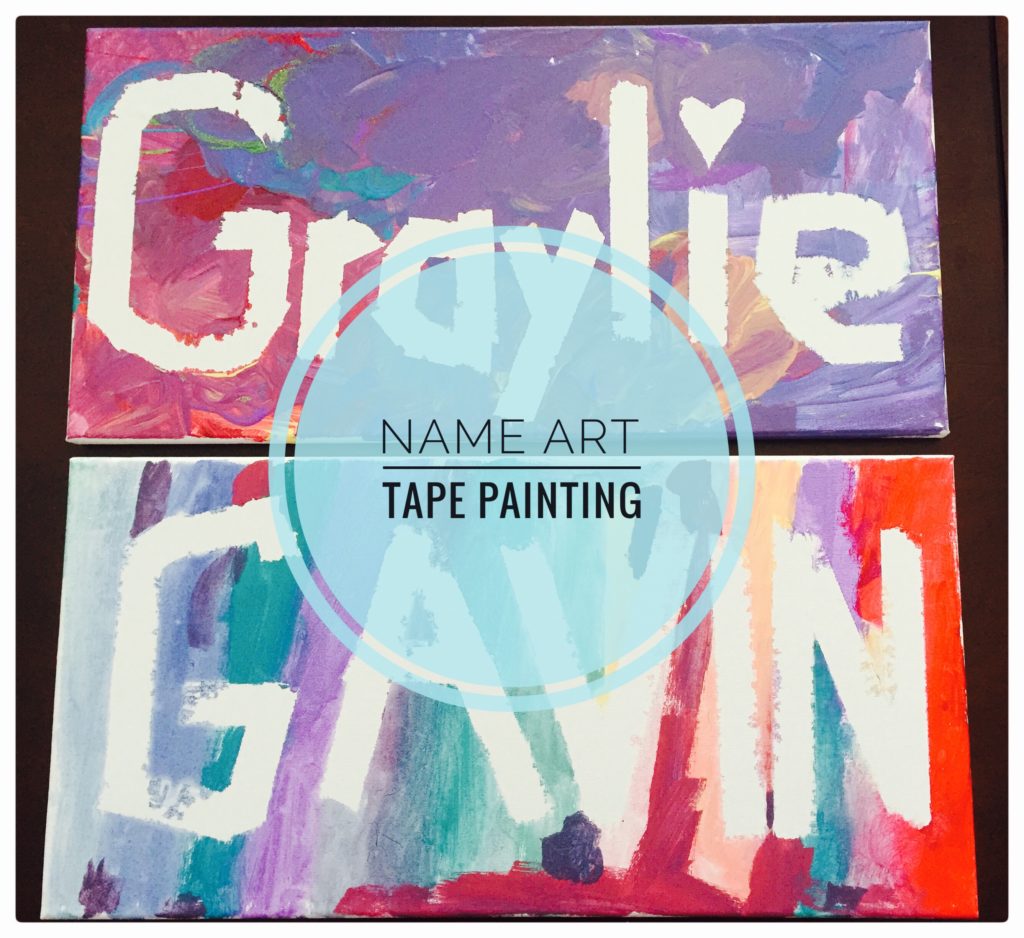
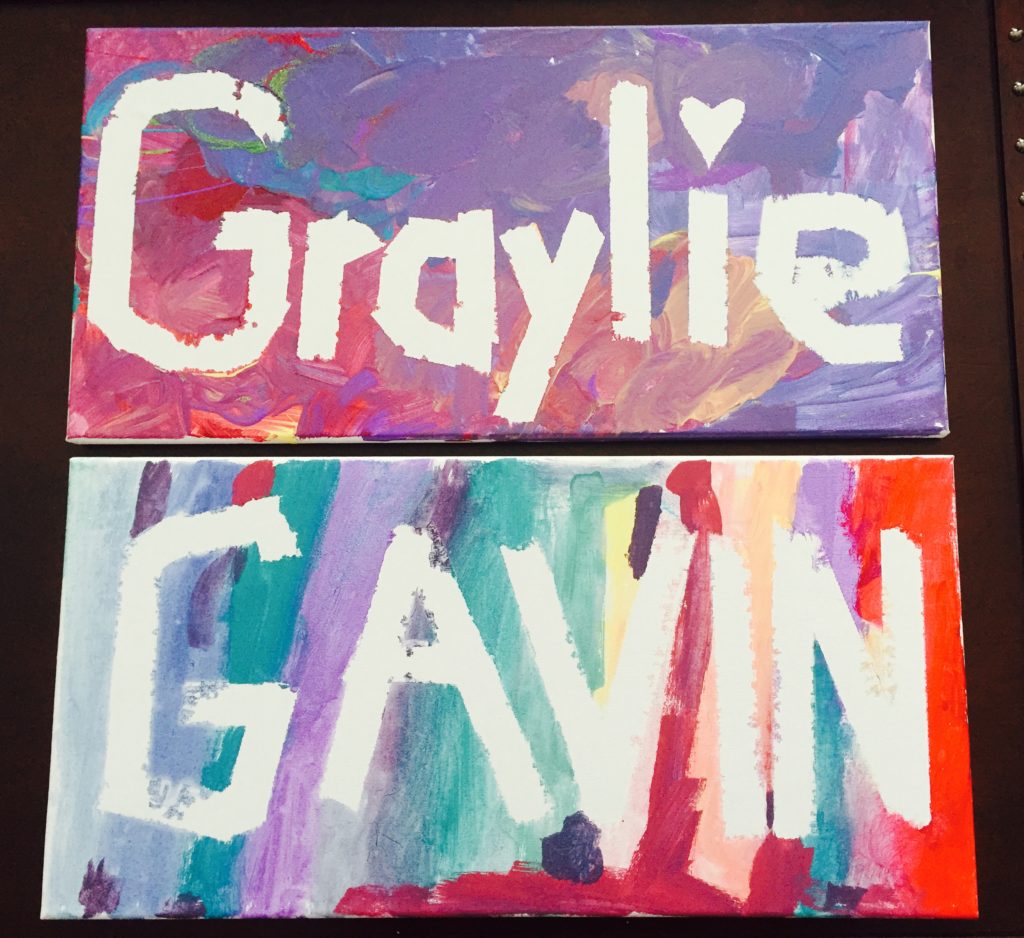
The night before we planned to do the tape painting, I taped their names onto the canvases with the painters tape. This made things go much smoother the next morning. Gavin and Graylie are not the most patient little people and were very excited to hear that we had a painting project.
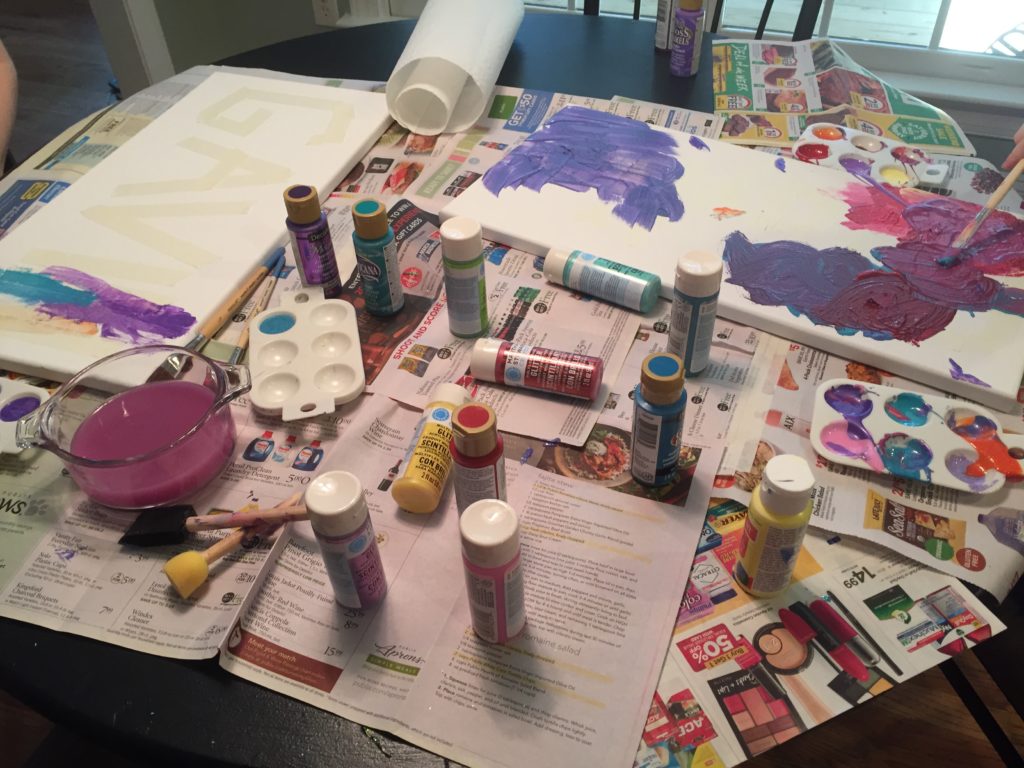
Once we had the table covered with newspaper and the paint dispersed, I just let them do their thing. Graylie just painted away in sections. I had to keep rotating her canvas to make sure she was getting it all painted. Since Gavin is older, he was able to actually have a design in mind and did his own thing. They both turned out beautifully! Once they were done painting, we left them to dry. We were able to pull the paint up on Gavin’s about an hour later. Graylie used a lot more paint so we waited about 5 hours before pulling up the tape.
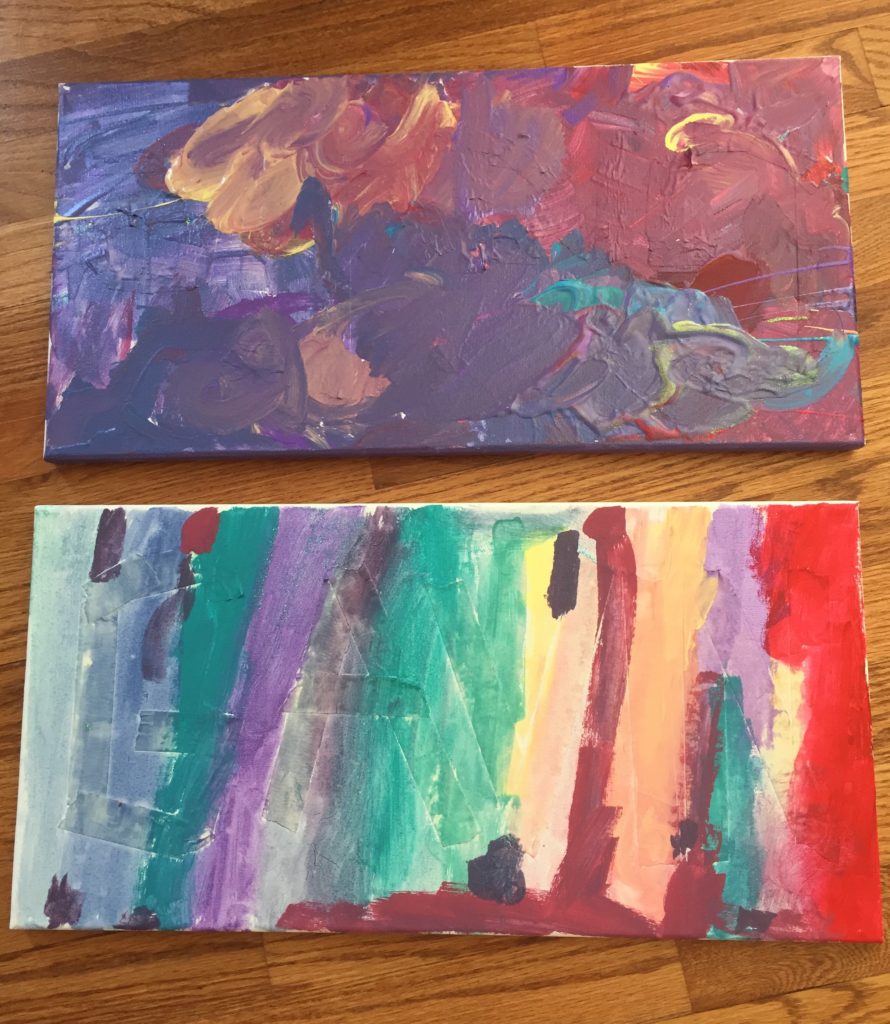
I was really impressed with these and plan to hang them in our playroom downstairs. If you are looking to decorate your child’s room or playroom this would be a nice piece or artwork to add. They were very proud of their work and were very excited to hear that I was hanging it up. Now they want to make another one for their bedrooms and I think that is an excellent idea!
Those are beautiful great way to keep their art