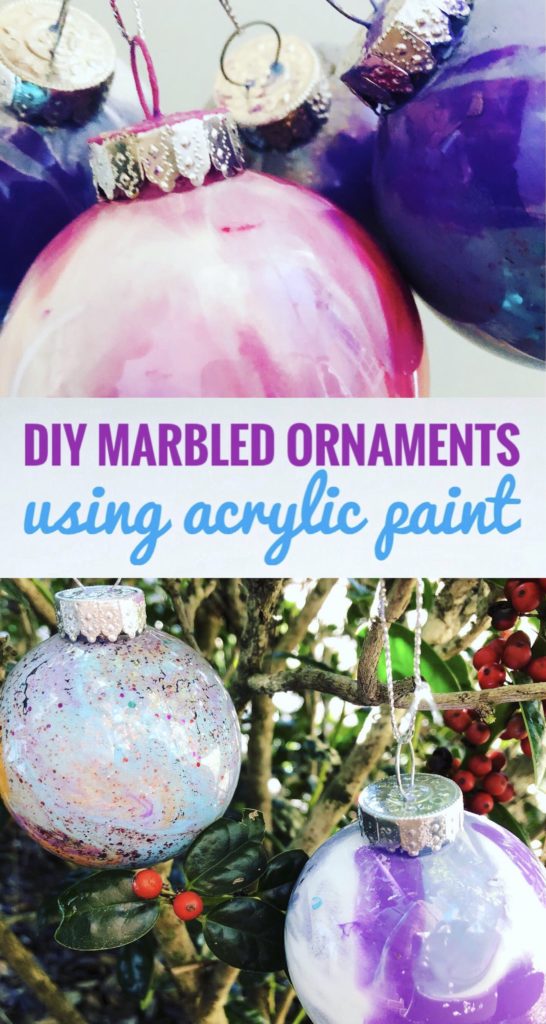
It is almost time to decorate the Christmas Tree! We plan to get out our trees out Friday. I know some of you may have already decorated the tree and that is great! If so, you’ll be ready to make these super easy DIY Marbled Ornaments using Acrylic Paint.
Welcome to the 5th annual 12 Days of Holiday Ideas event, hosted by Shirley of Intelligent Domestications and Erlene of My Pinterventures. Between Nov. 11th and December 6th there will be hundreds of new ideas shared by over 55 Co-host bloggers!
Go here to see our kick-off collection of Holiday ideas as well as all of this years talented participating DIY and Foodie Blogs. Download this years November and December calendars with all of the topics and dates so you can make plans to watch for ideas! Today we are sharing all kinds of DIY Ornament ideas.
We are hosting a BIG GIVEAWAY from our Sponsors this year! Be sure to scroll all the way down for more information and to enter to win!
This post does include affiliate links. That means I could earn a tiny portion of any sale that is made through clicking on any of these products with no additional cost to you. All support is greatly appreciated!
Deco Art Acrylic Paint
Today I am partnering with one of our sponsors Deco Art! We love working with acrylic paint. So you can imagine how excited we were to receive these paints from Deco Art. Can you guess which one was our favorite? The Galaxy Glitter of course!
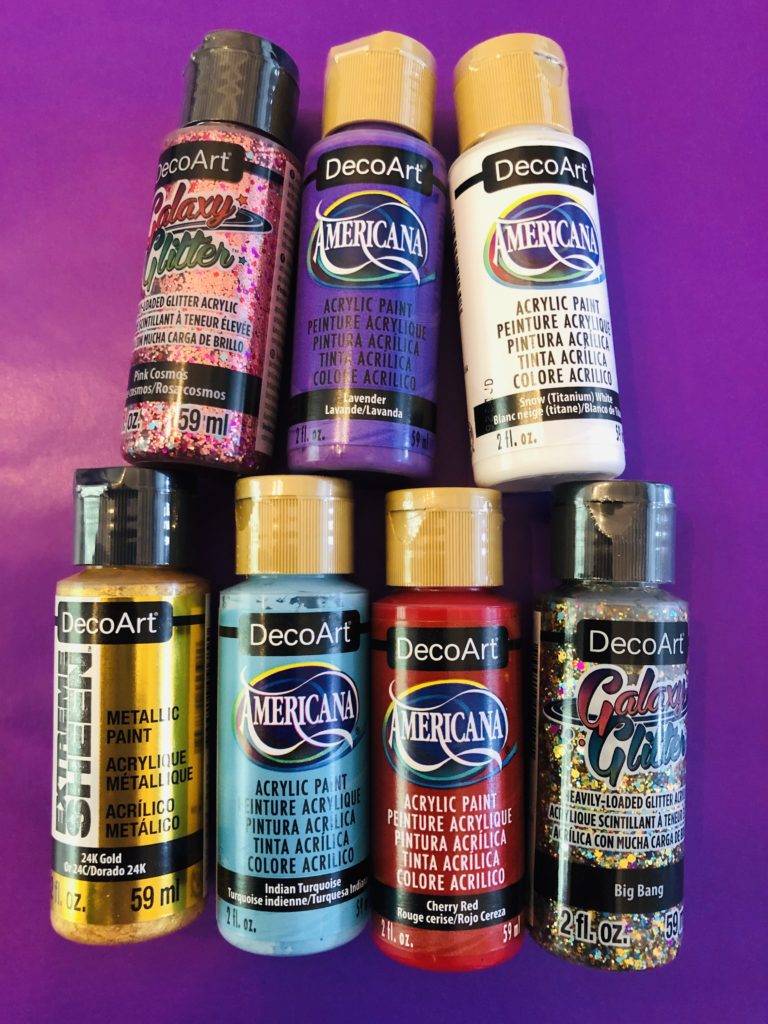
I knew these paints would be perfect for us to try DIY Marbled Ornaments. The Galaxy Glitter and Extreme Sheen Gold really put this project over the top.
Dollar Tree Ornaments
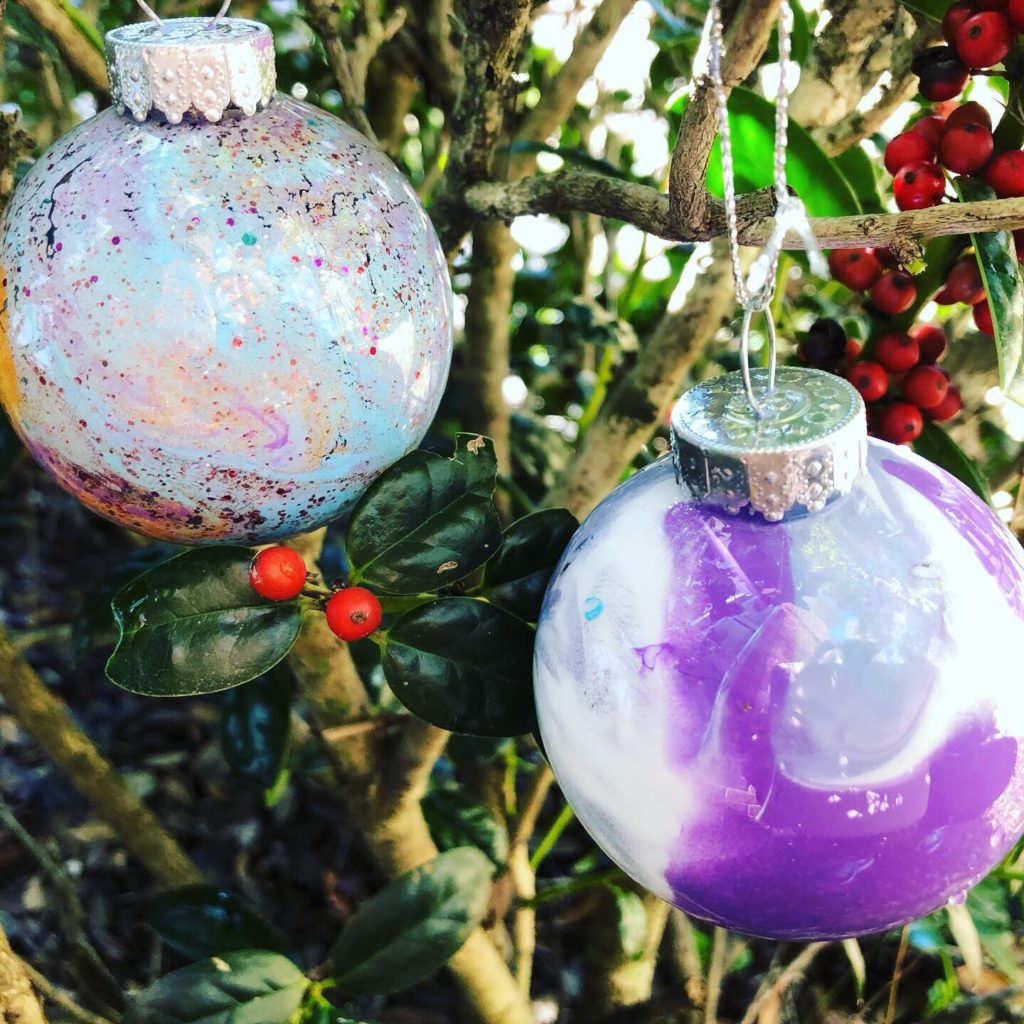
For this ornament craft I used plastic globe ornaments from Dollar Tree. I bought the small and large sizes. They both work great for this project.
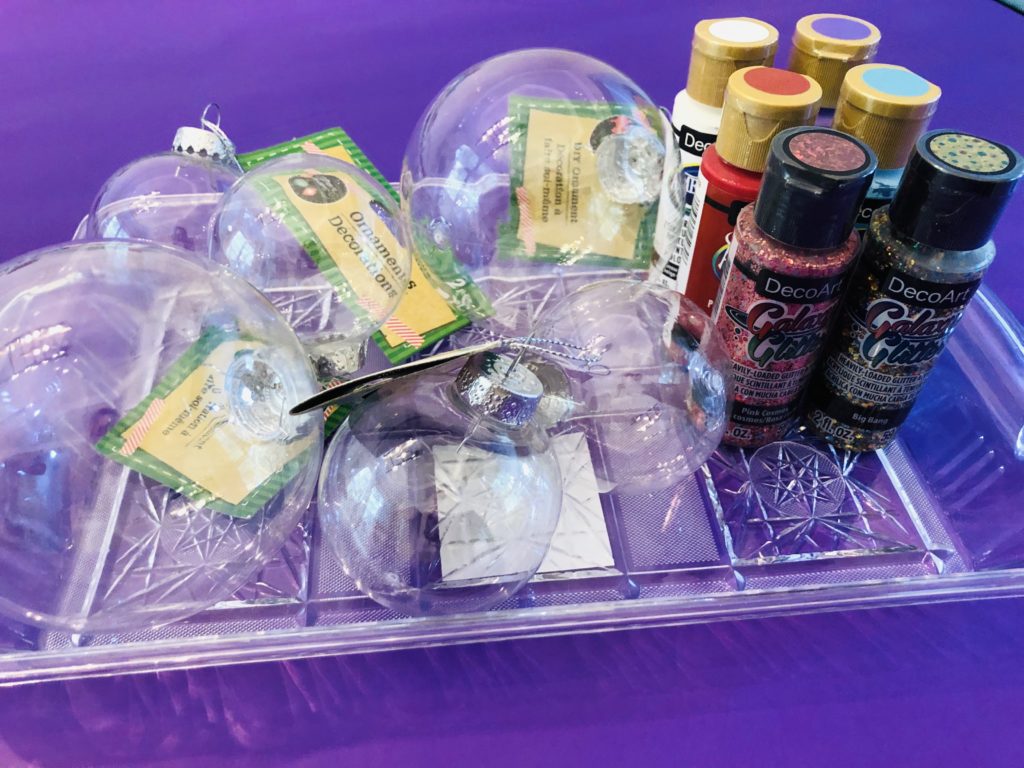
If working with younger children, I suggest using the smaller globes. Those come in a two pack for only $1! The smaller globes work better for their little hands.
Also, there is not as much space to cover with the paint. My little one got a bit frustrated during the process since she insisted on doing one of the big ornaments first.
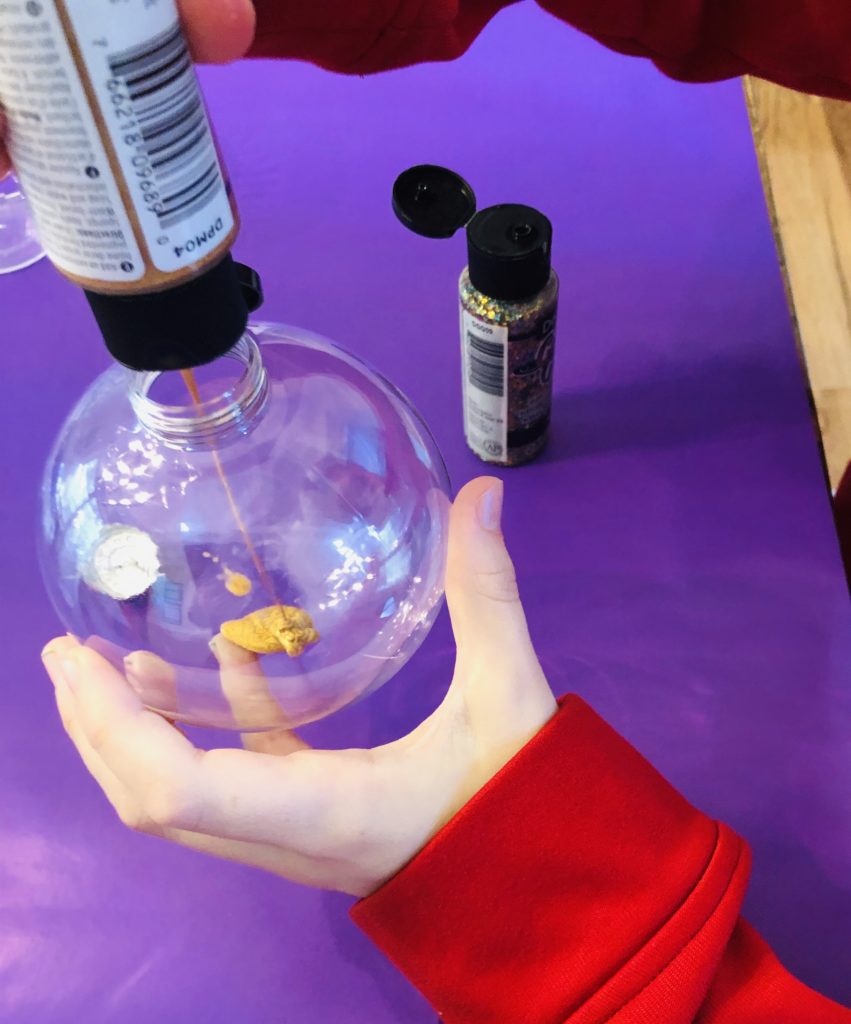
This ornament craft is super simple! The hardest part is choosing which paint colors to start with. Once you have that nailed down, start by squirting one of the colors into the bottom of the globe ornament.
I recommend using two to three different colors. When squirting in the next color, turn the ornament a little so the paint is in a different location inside the globe. Repeat the process for the next color.
Once the paint is inside the globe, hold your finger over the opening and start shaking. The paint will start covering the entire inside of the globe ornament.

Once the ornament is filled with paint, place it upside down in a plastic cup or other container. The excess paint will drain out and allow the paint to dry inside the globe.
It will take a day or two for the paint to dry. Then put the top back onto the ornament. The small ornaments have a hanger attached to the top. I used a pretty snowfake ribbon to create a hanger for the larger ones.
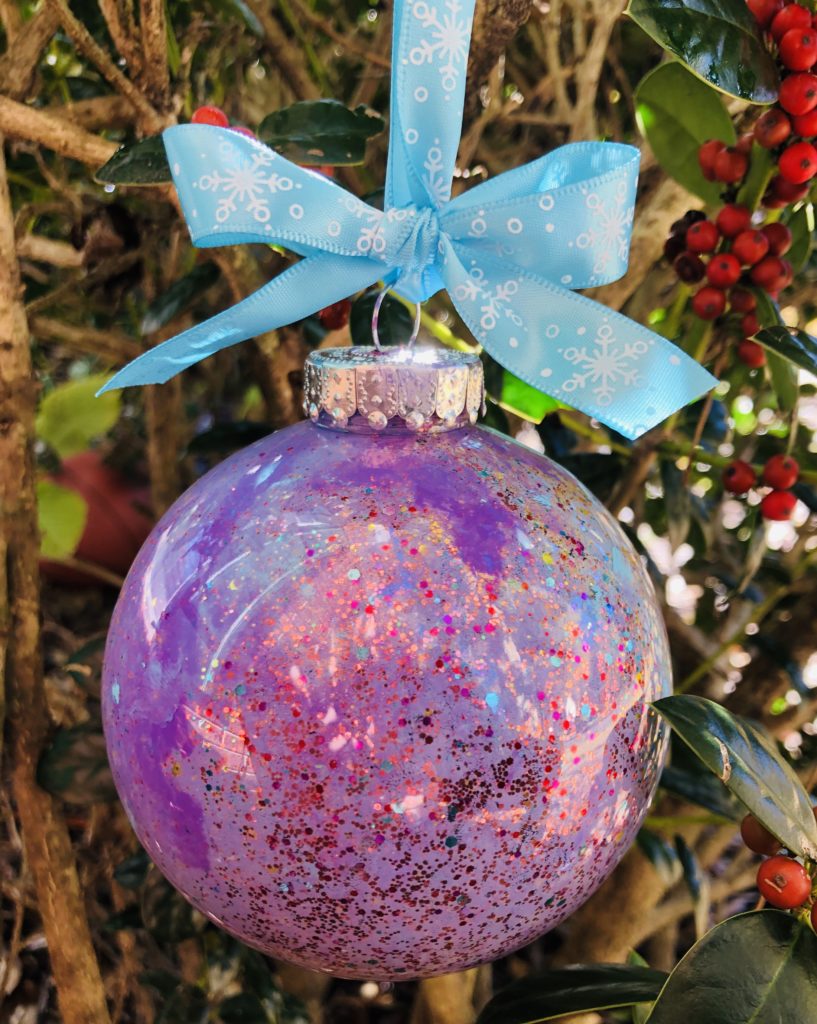
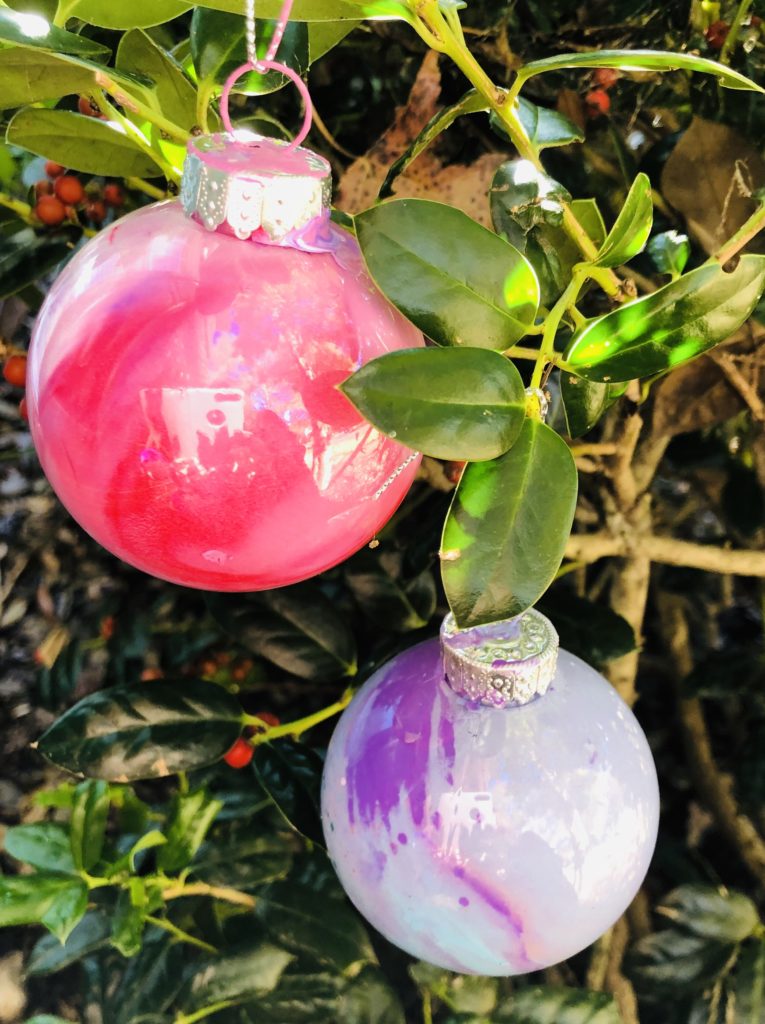
See how sparkly the Galaxy Glitter paint made these ornaments! I can’t wait to do more crafts with this paint.
Your marbled Christmas ornaments are so pretty and the possibilities for paint combinations are endless! The colors you chose are beautiful. Pinned
Beautiful! I can see i need some galaxy glitter. Great job!
The galaxy glitter paint is so pretty and I’m going to be making some with the kids for sure. The plastic ornaments from the dollar tree are perfect for kids. The colors are so pretty and everything is better with glitter.
These marbled ornaments all turned out so pretty. I especially love the speckled ones.