I’ve always loved the idea of creating a reading nook for my kids. When we moved last summer, we had to rethink our play area. What would have been the playroom in our old house was now the first room you saw when you walked into the front door.
Find a good spot for your reading nook.
I am still working on this area, but it has come a long way. I wish I had a before picture. One project that went into this room was a reading nook. I found an idea on Pinterest that I really liked. The only problem was I didn’t know how to go about finding what was used. That is why I am going to provide you with details of what went into the creation of our reading nook.
This post does include affiliate links. That means I could earn a tiny portion of any sale that is made through clicking on any of these products with no additional cost to you. All support is greatly appreciated!
Decide what kind of seating you want to use for the reading nook.
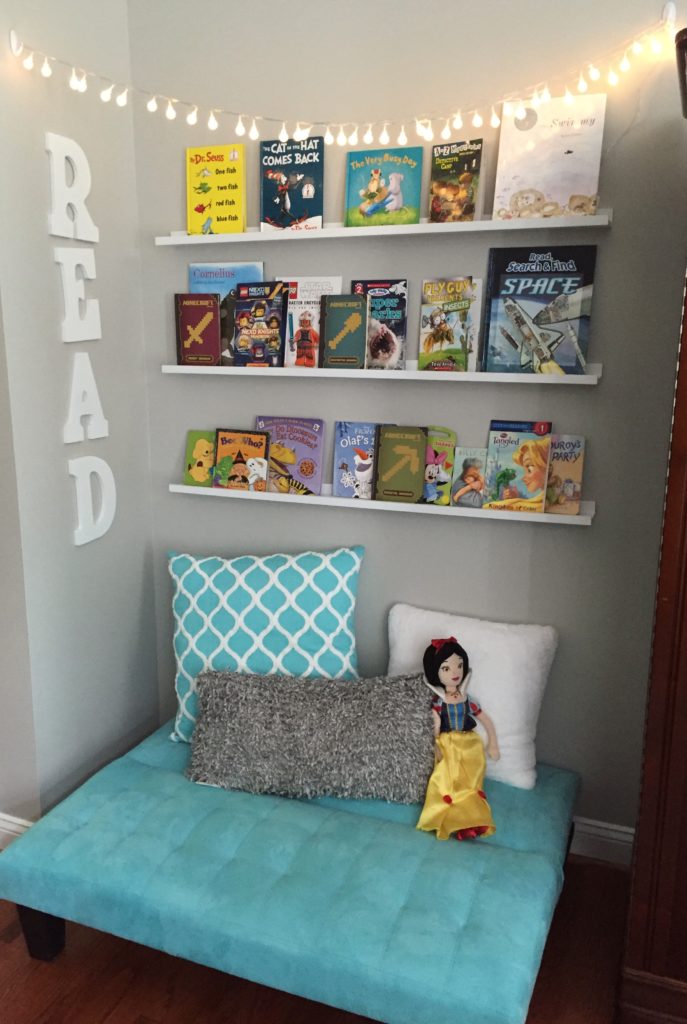
I started by ordering an inexpensive junior futon for the base of the reading nook. I ordered this in teal for our room, but it comes in other colors too.
I love the size of this futon for a reading nook. It is the perfect height for little ones to crawl up on to snuggle with a book.
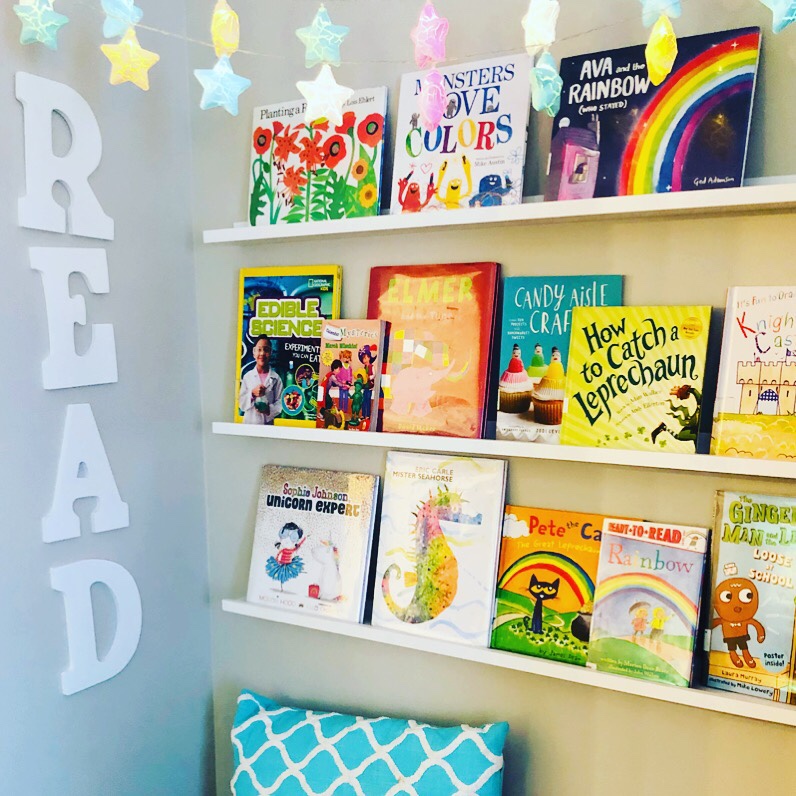
Decide how to display the books to make them easily accessible for the children.
The next step was finding the shelving that I wanted. That was the hard part. I measured the space and decided I wanted three shelves. I looked around at numerous stores, but ended up finding these white display ledge shelves on Amazon. They are amazing and make it so easy to display books and change them out seasonally.
Decorating the Reading Nook
Once we had the shelving up, I focused on finding throw pillows and the letters that spell out READ. The store “At Home” has a huge selection of reasonably priced throw pillows. Matching the color scheme of the futon was a little tricky. I decided to go with teal, gray, and white. I was able to find the letters at Michaels. They have letters that you can paint any color but I was happy to find solid white.
Add fun lighting to the reading nook.
After that, I started looking for string lights. I tried a couple of different ones before I found some that I was happy with. The ones that I chose are battery-powered so I don’t have to worry about the cords. I just hide the battery pack behind a book on the top shelf. I hung the lights across the area with command hooks. I try to switch out the books regularly to keep them interested. Here is the completed project. If this project doesn’t fit your space, just search Pinterest for reading nooks. There are so many great ideas out there. Having a fun place to read is a wonderful way to encourage reading!