Last weekend I tried something I have never tried in my life as a crafter. I decided I wanted to try to make a Patriotic Wreath. I have tons of wreaths pinned on Pinterest.
I have even considered taking a wreath making class. I have just never taken the time to actually decide which wreath I wanted to make. So when I saw this beautiful ribbon at Dollar Tree a few weeks ago, I knew it was time to put my wreath making skills to the test.
Dollar Tree 4th of July Supplies

This post does include affiliate links. That means I could earn a tiny portion of any sale that is made through clicking on any of these products with no additional cost to you. All support is greatly appreciated!
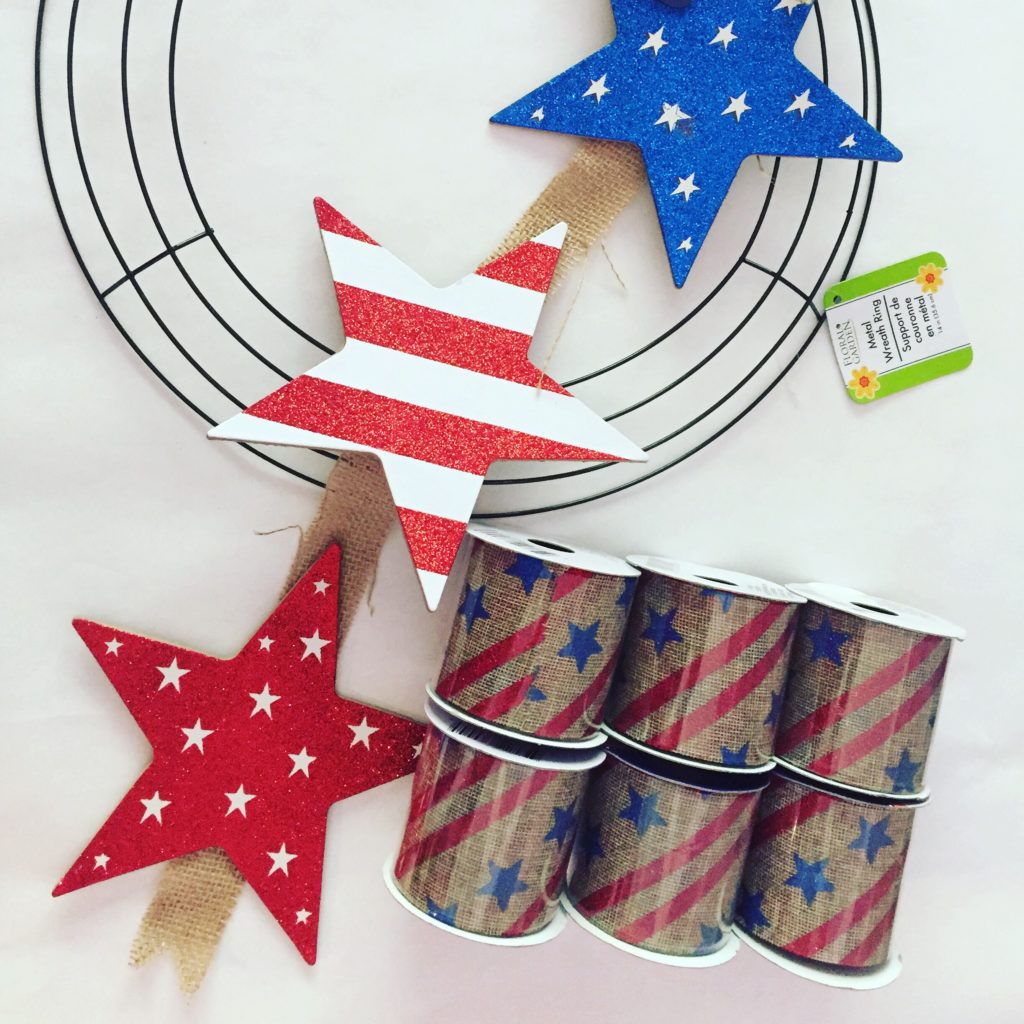
I could not believe the amazing selection of patriotic supplies and decor they had at Dollar Tree. I held back and only purchased the supplies I needed for the wreath.
I purchased a metal wreath ring, a beautiful star door hanger, and six rolls of ribbon. In the end I purchased too many rolls of ribbon. You can never have too much ribbon though. I’m sure I will find a way to use it.
DIY 4th of July Dollar Tree Wreath
The wreath you see pictured is not the wreath I had intended to make. In my head, I was going to make one of those beautiful, ruffled burlap wreaths. I’m not sure if this is just not the ribbon for that type of project or I just don’t have the patience of skills for it.
I watched a couple of tutorials and read some blog posts. Then I watched the tutorials again. I still couldn’t get it to work for me. I almost threw in the towel completely!
I put it all aside to do some crafting with the kids. Those are the kind of crafts I can do! I also really enjoy crafting with them and setting up projects for them to do.
I’m not sure if it was the break or the crafting that helped. When I went back to the wreath the next day, I started playing with the ribbon and decided to just wrap it around the wreath ring.

Simple Ribbon Wreath Tutorial
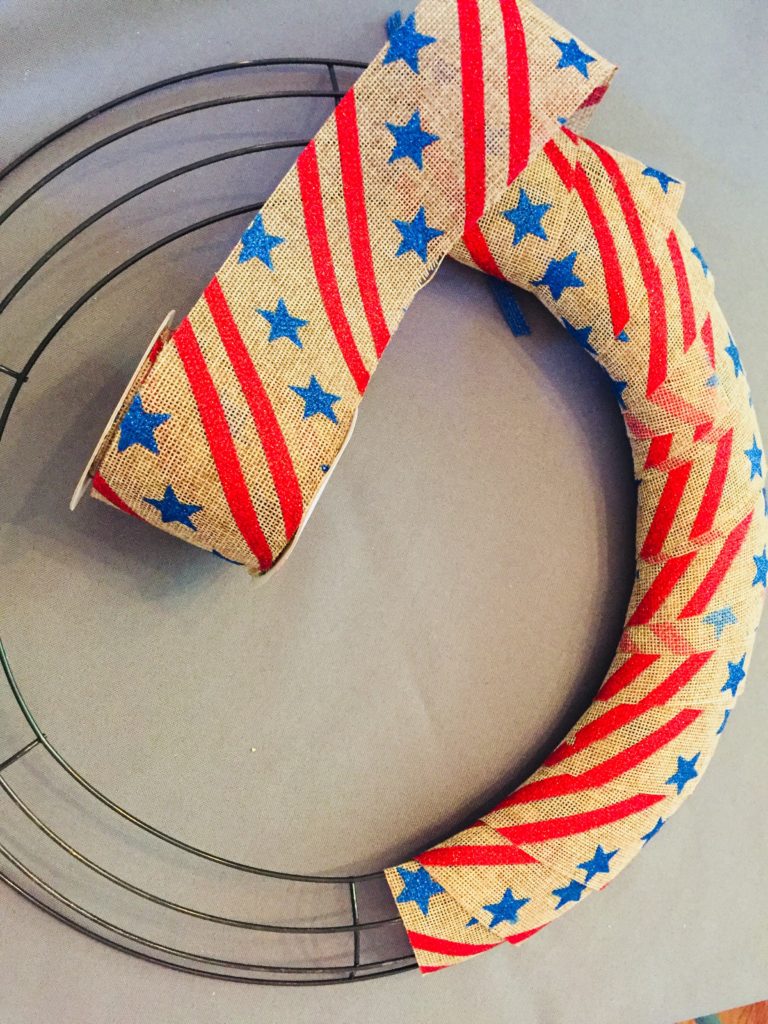
Once I saw how pretty the ribbon looked wrapped around the wreath ring, I had a spark in creativity! I realized there was hope for this wreath after all. Here are the steps that I ended up doing to create this wreath:
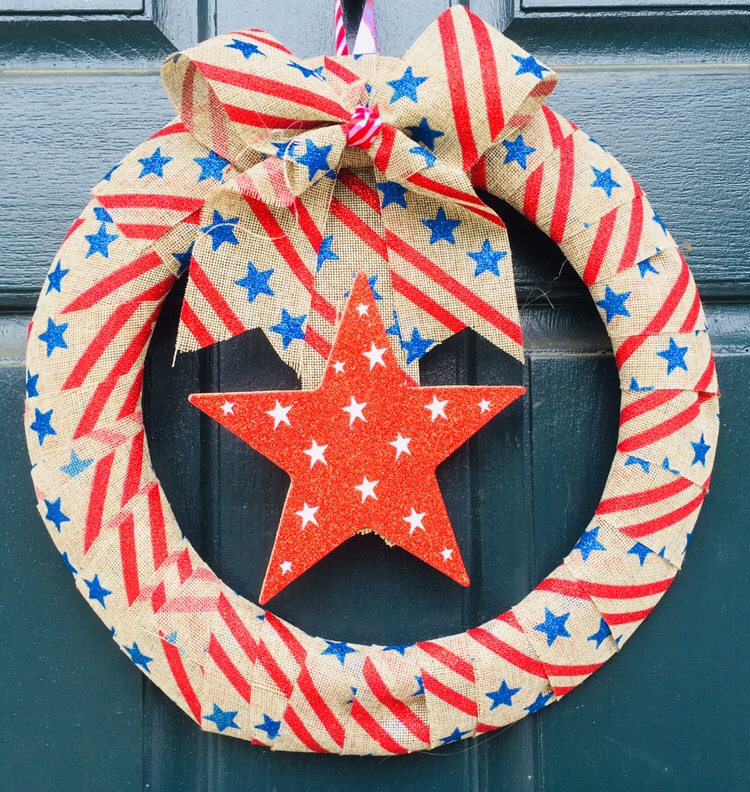
- Wrap the ribbon around the wreath ring as shown above. This took exactly two rolls of ribbon. I used my glue gun to secure any loose pieces.
- Using a third roll of ribbon, make a bow to attach to the top of the wreath. (This will only take a portion of that ribbon roll.)
- Cut the star off the burlap decor.
- Cut approximately 6 inches of ribbon from the remaining third roll to adhere the star to.
- After adhering the star, glue the other end of the ribbon to the top of the wreath on the back side.
- Glue a ribbon loop to the top so the ribbon can be hung.

I hope this make sense. Please feel free to ask me any questions you may have. I was really pleased with how cute this wreath turned out and will definitely be making more seasonal wreaths now. I’ve now made an easy Christmas Wreath with this technique using the adorable red truck ornament from Dollar Tree.
This project cost me about $5.00. I can definitely not purchase a wreath for that amount. Now that I know what I am doing with this type of wreath, I think it would take less than 10 minutes to put together.


It looks great Heather! I love that ribbon! I wish we lived closer and I would help you make a bubble wreath.
Thanks Jenny! I was thrilled with the ribbon! I would love it if we lived closer. You could give me Cricut lessons too! ?
Adorable and very affordable. My old 4th wreath has seen better days so I need to make a new one.
Thanks!
Thank you so much! This was such a simple wreath. I made a similar one during Christmas.